Click Here For Free Blog Backgrounds!!!
Blogaholic Designs

Friday, December 23, 2011

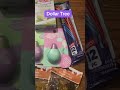
Dollar Spot Tic Tac Toe decoding game

I am so blessed to have such giving parents this year. They gave me a $50 Target gift card for my birthday in November! I wanted to spend it all on the kids, but since times are tough I bought some gifts for my daughter, but I did manage to grab four of these tic tac toe games. There were adorable pink and purple ones, but you know, the boys wouldn't want to play with those.


So this is what I did with them. I've trained taught my students to look up at our choice board to see what they can work  play with after they are done with each of their center rotations (hopefully next year I can convince my partner to switch centers because many times they are just not productive).

Anywho . . . I decided that students could play in pairs but they couldn't place their gamepiece unless they could read the words in the spot they wanted.


I cut up small labels the size of the gameboard circles and wrote different two-syllable, easily decodable words on them. One board has words with 'M' . .


Another words with 'P' . .


Another words with 'S' . . .


And the final with words with 'T'.


These are the first four syllables that kids learned this year. I will change out the words as the year goes on. Hope it goes over well.



Thanks for the Liebster Blog award!!!

Thank you so much to Louanne over at My Kindergarten Kids for giving me this award! I've been so absent from the blogging world since the school year started that this is a welcome surprise, especially because now I get to share the wealth with others :).


The goal of this award is to spotlight up-and-coming blogs with less than 200 followers.
The rules are:
{1} Copy and paste the award on your blog.
{2} Thank the giver and link back to them.
3} Reveal your top 5 picks and let them know by leaving a comment on their blog.

Here are mine!!!


FlapJack Educational Resources


Whyte Water

Tuesday, December 20, 2011

Student friendly writing rubric

We of course have the writing rubric that teachers use to grade students' writing. Ours is a 4 point rubric on each of the 6 traits. However, this doesn't help our students in self-evaluating their writing, so a few years back we began using this student rubric.

Students grade their own writing, first with teacher guidance, using the four points of this rubric: I finished and colored my drawing, I incorporated a capital and period in each sentence, I placed spaces in between my words, and I used my sounds to write. For the last part I tell students that if I can read it and it says what they wanted it to say then they used their sounds correctly.
I think there are many other things that I would like to incorporate such as penmanship, a detailed drawing, and word choice, but don't want to overwhelm the students.

What do you think?

What do you use?


Monday, December 19, 2011

Cute way to integrate art with writing

So . . .  our new "not really the principal but has been given the work of principal instead of support teacher" decided that us language arts teachers will also teach art. Well, with the pace of language arts that we have it has become extremely difficult, but here is what my students did once, and they finished in a 20 minute center :)

First, students had to write their sentence. If not, they couldn't paint (some need that motivation). We all wrote the same sentence together. I see a ______. I have a really cute book that shows how to fingerpaint a number of different animals, so as I painted each student's fingers they painted their  . . . can you guess?? After each color they went to wash their hands. What do you think?


Modge Podged Christmas gift

For those of you who might still have a few more days of school and need an idea for a Christmas gift, here is what we did . . . .

 Choose a few drawings that you would like to have your students trace and make enough copies for your students (my largest group in centers is 9 students so I made 9 copies). Tape them down to the table so they don't move. Cut up transparencies in fourths and tape each quarter sheet of transparency on top of the drawing each students wants to trace.

 Instruct students to trace along the black lines with a black sharpie first. (I didn't think they could, but they did very well). Then they can color the rest of the drawing using a sharpie. I really underestimated my students but they did really well by themselves! I wrote each student's number so it could be identified later (since this took a few days total) and placed them in ziploc baggies with their names.

 At a different center each student modge podged 4 fat popsicle sticks in the color scheme of their choice. I just cut up holiday tissue paper (about $3.00 total) into sort of squares and let them at it. Since I'm a bit of a control freak and didn't have that much modge podge I painted all of the sticks myself and them painted them again the next day to reduce the risk of ripping. Students saved these in their baggies as well once dry. 
 Then I simply stapled each drawing onto a piece of cardstock that matched the color scheme of each student's popsicle sticks. Make sure that you place the yarn/string in place BEFORE gluing the packing onto the sticks. I learned this the hard way. Regular elmers glue, just make sure students really hold it in place for a loooooong time.

 And voila .  . . glue each child's photo on a desired spot, have them write their names somewhere with a marker, and done.
 I had them write a very quick little note, to . . .  from. . . . and a drawing inside.
Did I mention I had all of these supplies already, just had to buy the tissue paper? That's why we did it. My partner found these perfect envelopes. We just slipped the frames inside, punched holes in the top of the envelopes and notes, tied with a string, and done (sorry didn't take a final picture).


Sunday, September 25, 2011

Cover Sheets

Wanted to share some of the cover sheets I've created for various things. Hope someone can use them.

This is the cover to our daily behavior communication folder. I need to take a picture of one, but basically it has this on the cover, inside are mini calendars of the entire school year, and on the back is a legend of what the different colors mean. You can get a copy of the Behavior Folder Legend here.

This is the cover to the communication binder I posted about here.
This is something new that my partner and I are trying this year. We use Houghton Mifflin practice book pages but separate the pages by themes so that they are easier to manage. Last year I stapled each with a construction paper cover but that's a lot of construction paper. This year we decided to laminate manila folders with this cover sheet and use brads to secure the pages inside. We'll see how it goes.


Home School Communication

We've only been in school for a month but I think I've communicated with parents more in this month than in any other complete year :/ Many of you know what I'm talking about :) So I've had to keep a log which is something that I should have been doing anyway, but never got around to it. Here are two different communication logs. I use the simple one, but a great coworker emailed us the cutesy one. Hope these are useful to someone. If you happen to use them I would love to hear from you :)


Dropbox - Sharing files without email or flash drives!

I just discovered Dropbox.com and I looooove it! My school issued laptop works fine at home but only turns on when it feels like it at work, so printing out files and just looking up things is very difficult. But then I heard about dropbox and I don't know how I've lived without it. It's great!


Just log on and create a FREE account. Then you can add a dropbox folder to any computers you use and simply drag files to that folder and they will be available online or on any other dropbox folder on your other computers ANYWHERE, ANYTIME! No more e-mailing yourself large files that take forever to send or figuring out which flashdrive holds the files you want.

Try it out and you'll never go back!

Monday, September 5, 2011

Alive and kicking! And Hard!

Sorry it's been soooo long, but as most of you have experienced, blogging during the school year is not as easy as during, so my posts will have to be short and sweet from now on :) At least until Winter Break.

Last Monday the kids came and I read them Un beso en mi mano. The "shortened" version because my 2nd group this year is quite a doooosey (I have no idea if that's how you spell it).


The fun part is that for snack time I made the kids kissing hand cookies. I got the idea years ago off the web. Of course I don't remember where. Here are the before cookies.


I'm no baker so I bought the ready to bake sugar cookie dough from Pillsbury, rolled it out, cut it out using my handy dandy hand cookie cutter (sorry, forgot the picture), placed on an ungreased cookie sheet, placed a nestle chocolate chip in the palm, baked @ 350 for whatever time the dough said, about 10 minutes . . .
And then . . . . voila!


Pretty much the same just fatter :) Still white since they're sugar cookies. Cookies and milk with a message make a great first day snack :)

Friday, August 19, 2011

One week to go!!!! My classroom so far.

Ok, so a while back I posted my before pictures and said I would update them, but I haven't, because I'm a VERY slow worker. What would take a "normal" person a few hours to do might take me all day. I don't know why, I just sit there and think . . . a lot. Example - it took me 5 hours to put up 5 bulletin boards. Only the fabric and borders mind you. Anyway . . . here is a glimpse of what I have so far. I'm actually pretty proud of myself because the majority of the mess is gone and I'm much farther ahead than other years.

Very proud of this. My new centers area where groups will come to turn in their work, pick up materials, journals, and practice workbooks. As you can tell, my groups are red, yellow, and green. Unfortunately, I've spent so much money I can't even shell out $1 to buy the missing yellow tub :( Maybe later on.

A parent last year (great parent!!!) donated this chica tree but later in the year. This year I'm going to use it starting day 2 when we begin the alphabet. We'll place each letter we learn on the tree and when we complete the letters we have a chica chica bum bum (yes I spelled it right, in Spanis :) celebration!!

I struggle with this part every year. My library. This year I bought the pretty blue and green bins, but could only afford 10, so this is where my small library will be. Currently my trash area as well. Not even my broom (sadly "disappeared"). I still need to wash the rug and pillows that will bo here and label the bins. You can check out my labels here. They're free :)

This is how I left this corner yesterday . . . . and today the custodian took all of the chairs out! Yay! So now (in 3 diff. pics) it looks like this . . .

Students' paper cubbies. I have to have cubbies for my now 50 students because I teach language arts to my class and my partner's. These only hold 24 each, so @ each end one student from each class will have to use a paper tray. The trays in the middle are for students who come from the office with papers to send home. I will hopefully train teach them to place them here instead of interrupting me :)


My "I don't know what to call it if you have an idea please tell me" area. This is where students will turn in homework and thursday envelopes. Of course, missing a tablecloth (needs to be washed).

Listening center. Unfortunately, I've never been able to implement a listening center because I only have one set of books with tapes/CDs. This will be my next donor's choose project (hint-hint). I think I'm going to ask parents to record them this year because I really think it's important for the kids, especially my English only students, to listen independently.

My new teacher's desk. It was donated to our school this year along with the chair. I love it because it's small. My previous desk could have been 2-3 times larger. The only reason I have a desk is because I have the after school program in my classroom every day until 6 pm and therefore need an area to work. They use all of the tables.

My writing BB. I place students' monthly writing assessments here each month using the clips that are there (sorry for the fuzzy pic). I don't take any of them down until the end of the year so that I can easily put them together and send them home as a great memory! Oh . . . and one of the few unsorted piles of 'STUFF' left :/

The beginnings of my literacy centers (like may do's). I've tried many times to incorporate this into my teaching, but have always resorted to the easy playdoh, white boards, blocks, etc. for students to do when they're done, but I really want them to do more enriching activities. Wish me luck! Still need to create a way to give them a choice of what to "play" but in an orderly fashion.

Student cubbies. Had to buy the white wire one on the left because the pink one only hold 20 backpacks and I will have 25 students.
Finally this is in my office. Super easy and organized :) Yay for me. Just pushpins in the wall and black binder clips holding everything up. Easy access to borders, sentence strips, b-day crowns (which I pre-write their names on and place them in order to make things easier), and anything else that lends itself to hanging.

Ok, that's all for now. It might not look like much, but if you knew me, you'd be very proud of what I've done a week before I have to be done. Stay tuned for the final pics. Definitely by next Friday because that's when we have our ice cream social to meet our new kinders!

Check out Teaching Blog Addict to see some great classroom pics!! They're even sorted by grade level!


Monday, August 15, 2011

Using powerpoints for letter assessment

Do any of your students get SUPER nervous when it comes to test time? A number of mine did and the monthly assessment we administer is sooooo long (capital and lowercase letter names and sounds, 50 high frequency words, writing their name, 31 numbers, 12 shapes, colors, counting, patterns) that they either didn't try their best or were really bored taking it. So . . . I thought up a funner way to test at least my section (the language arts). Powerpoints!

I had already used powerpoint presentations to have students practice blending syllables (later post on this) so I thought I'd give it a try with the assessments. I simply typed up a PPt with a letter per screen on a simple background so that they wouldn't get distracted by the graphics. They come to me, sit in front of my laptop, and get to click away as they tell me each letter name and sound. They love it! They ask me at recess, lunch, after school, etc. . .  when will it be my turn?? It also makes things a lot more bearable for me since I have to test now 50 students every month.

Click here to download a copy of the alphabet powerpoint.

It was so successful that I decided to do the same for the high frequency words. Click here to download this PPt. Of course, it is the 50 Spanish HFWs. If anyone would like me to create an English one for you (of course its really simple so you can easily type it up) just e-mail me a list of the words and I'll gladly do it for you.

Hope someone is able to use this and it helps as you plan out your year's assessments :)

Sunday, August 14, 2011

Freebies and Giveaway!!

Have you seen Kinder Latino's Freebie links?? Plenty of freebies all in one place!

Kinder Latino
You can also enter for a chance to win anything from Lidia's TPT store! Many chances to win. I really hope I win because I reeeeeeallly want her ABC packet. She has so many great bilingual resources!